A disposable razor can be a fickle travel companion. Cheap, light, allowed in carry-on luggage, and easy to replace, yet just as capable of leaving razor burn and missed patches as of delivering a presentable face before a meeting. I’ve shaved in airport restrooms, mountain lodges with questionable plumbing, and hotel rooms where the mirror fogs at the first hint of hot water. The trick wasn’t fancy gear. It was understanding how to coax consistent performance from the simplest tool in the kit.
If you prefer a safety razor at home, a straight razor on weekends, or a particular brand like a Merkur 34C or a Henson razor with tight tolerances, you already know technique matters more than marketing. The same fundamentals work for disposables, you just adapt them to the blade and conditions at hand. Below are field-tested methods that make a throwaway razor behave more like a tuned instrument. You’ll still replace it, but you won’t dread the shave.
What you’re up against with disposables
Disposable cartridges and single-blade sticks are designed for low cost and low friction in manufacturing. That means modest steel hardness, inconsistent coatings, and fixed angles that assume one face fits all. After two to five shaves, most disposables lose their edge or accumulate buildup that changes how they track over your skin. You can’t swap in fresh double edge razor blades like you can with safety razors, and you can’t fine-tune blade exposure like with a Shavette. The path to a better shave is technique, prep, and small modifications that take seconds.
Two oversights ruin most on-the-go shaves. First, dry skin and crisp whiskers. Hair shaft diameter increases by a significant percentage when hydrated for a couple of minutes, and hydrated hair cuts cleaner at lower force. Second, poor blade alignment pressure. Pressing harder to compensate for a dull or dragging edge bends skin into the edge and invites irritation. Neither requires a home barbershop to fix.
Prep like you mean it, even with hotel amenities
I carry a nickel-sized synthetic shaving brush in my dopp kit. It adds almost no weight and turns a tepid hotel soap into usable lather. If you have room for a small tube of shaving soap or cream, even better. A basic brush, synthetic or boar, gives you more control than canned foam when you’re stuck with tiny sinks and hard water. The brush lifts hair, paints hydration where it matters, and gives feedback on slickness.
No brush? Work within the constraints. Splash warm water for at least sixty seconds before you lather. If water runs cool, hold a wet washcloth against your beard area for two minutes. That softens just as well as a hot shower and costs less time than fishing for a better razor in your bag. Conditioner doubles as pre-shave when soaps are drying, and a pea-sized amount under whatever foam the hotel provides adds glide. Bar soap is a last resort; it cleans too well and strips oils that help a blade slide. If bar soap is all you have, add a few drops of body lotion to the lather in your palm. The lotion resets slickness and reduces drag.
The travel-sized shaving brush isn’t only for traditionalists. Even if you prefer an edge razor or a modern Henson shaving kit at home, the brush earns its space on the road. A synthetic dries quickly, doesn’t smell, and won’t trigger security questions. Use small circles for twenty to thirty seconds, then paint strokes to align the lather. If you shave every day, the extra minute pays you back in fewer nicks and less redness.
The angle problem you can’t see, and how to fix it
A disposable’s head dictates the angle, but your hand still sets the contact. If you think of the head as a tiny plane, you want the top cap to just kiss the skin with the blade trailing behind. Many people tilt the handle too steeply, so the guard and edges dig in. Instead, start a stroke with the handle far from your face and slowly rotate toward your skin until you hear the first hint of cutting sound. That sound is your indicator, not pressure.
Check your angle at three spots that vary in curvature: cheek, jawline, and neck hollow. Most razors give you slightly different blade contact among those areas. On your cheeks you might keep the handle closer to parallel with the floor. Under the jaw you often need a lean-in, which feels wrong at first. You’re not forcing the blade, you’re aligning the edge so it slices rather than scrapes.
If you trained on a safety razor or a single blade razor with a fixed exposure, carry that memory. Light pressure equals fewer problems. The same applies to a disposable Razor, even though the plastic handle tempts a heavier hand. Hold the razor like a fountain pen and let the weight of your fingers supply the force. It feels too gentle until you see that the lather trails cleanly behind the pass.
Map your grain quickly, then use micro-strokes
Even on the go, take twenty seconds to feel the direction your stubble grows. On many faces, cheek hair grows down, the neck grows up or diagonally toward the Adam’s apple, and the jawline swirls. Two fingers running against the grain tell you where you should not start. Your first pass should be with the grain or across it, never against, when using a fresh-to-unknown disposable.
Instead of sweeping a full cheek in one move, try micro-strokes an inch or two long. Lift, rinse, reset. This keeps a slightly dulled blade honest. It also prevents the head from clogging with lather and cut hair, which is the silent killer of glide. When you hear the blade chatter or skip, you’re pushing length through foam rather than cutting. Short strokes fix that. If your razor has a pivoting head, micro-strokes help the pivot do its job rather than forcing it to lock at the wrong angle.
Make poor lather work harder
Travel foam is often airy and slick for ten seconds, then sticky. You can manipulate it. Work more water into it than you think it can hold. A wet brush with a small amount of product creates a thinner film that stays wet longer. A thick, pretty lather dries quickly, sticks whiskers to your face, and lifts them back into the blade’s path. Thin and shiny beats thick and matte in a cramped bathroom.
If you carry shaving soap, look for something hard and triple-milled. A small puck lasts for months, and you can load your brush from it in ten seconds. Creams in 30 to 60 ml tubes are also easy to fly with. You don’t need a fancy brand. A mid-tier cream plus a brush outperforms almost any canned foam with a disposable razor.
Rinse smarter in water-limited situations
On mountain trips or in small cabins, water pressure and heat lag can turn rinsing into an ordeal. Use a cup or the sink basin. Fill it with warm water and dunk the razor every few strokes, tapping gently against the side to knock out hair. If water stays cold, friction still matters more than temperature for clearing the head. A tiny drop of dish soap or shampoo in the rinse cup increases surface tension and helps break buildup that clogs the blade. This matters most on multi-blade disposables that trap lather between edges.
I sometimes carry a travel-size squeeze bottle. When the sink is questionable, I use the bottle to direct a stream right through the blade gap. The head clears in one second, your lather stays fresh, and you don’t stand there fighting a trickle. It also keeps the razor from scraping against a dirty sink.
Stretch your skin in the right direction
With any razor, a taut surface beats a loose one. But the direction you pull matters. On the cheeks, pull up at the sideburn to flatten the area below the zygomatic arch. Along the jaw, pull down at the corner of the mouth to straighten the curve. On the neck, tilt your chin up slightly, then pull from the side to avoid dragging skin into the blade. You’re not stretching to the point of discomfort, just removing slack.
The lower neck is where disposables misbehave. The combination of shallow hair angle and thin skin turns a harmless pass into razor burn. Keep the pressure feather-light, keep strokes short, and follow the grain religiously on the first pass. If you https://classicedge.ca/collections/wet-shaving-accessories-for-men-by-the-classic-edge-shaving-store-pg2839283921 need closer, re-lather and go across the grain only. Against-the-grain can wait until you have a steadier setup or a better tool.
When, and how, to squeeze more life from a disposable
A budget disposable often gives two to four good shaves. You can coax one or two more with proper drying. After rinsing thoroughly, flick the razor sharply a few times to shed water, then drag the edge backward along a towel or your forearm, twenty light strokes. You’re not sharpening so much as aligning the microscopic burrs that roll during use. The motion is opposite the cutting direction, like stropping a straight razor. This takes less than thirty seconds and reliably cleans minor corrosion from overnight humid bathrooms.
Storage matters more than people think. Don’t leave the razor head-down in a plastic cover wet. It traps moisture and accelerates rust. Lay it on a dry washcloth or stand it upright to air out. If your hotel has a fan or a sunlit sill, give the razor an hour there. A dry blade faces less tug on the next shave.
If you notice significant tugging at the start of the shave or visible corrosion along the edge, stop squeezing. A dull disposable becomes a skin-peeler. Replace it. You wouldn’t force a cheap cigar past the point where it unravels, and you shouldn’t force a spent blade across your face.
The two-pass travel system
Most faces can tolerate two passes with a disposable when you prep well and use good angles. One pass with the grain or across for reduction, rinse, re-lather, then a second pass across the grain in the opposite direction. You’ll look sharp by normal standards, and you avoid the high-risk against-the-grain pass that reveals a razor’s limits. If you need a photo-clean upper lip or chin, do a targeted mini pass. Keep that third touch-up limited to stubborn areas, not the whole face.
For daily shavers, that pattern balances time, comfort, and presentation. If your whiskers are coarse and fast-growing, plan the shave closer to your event, and hydrate longer during prep. A disposable can handle coarse hair, but it demands more slickness and more patience.
How to fix specific problem areas
The moustache area resists dull blades. Take a separate thirty seconds to hydrate the upper lip with warm water or a damp towel while you shave your cheeks. When you get to it, angle the nose up slightly and use very small strokes, barely the width of the razor head. Wipe the area clean between strokes to keep visibility.
Under the jawline is where cutting angle shifts mid-stroke. Split it into two zones. Shave the face side with a cheek-like angle, then reset and shave the neck side with the handle tilted forward a touch so the edge meets hair cleanly. Avoid long sweeps that ride over the point of the jaw.
On the Adam’s apple, pull the skin to the side so you shave a flat surface next to it. Don’t chase hairs directly over the bulge. That’s where most nicks start, and with a disposable you don’t have the surgical control of a Shavette or straight razor.
Workarounds for gear minimalists
Even if you’re traveling with just a toothbrush and a disposable, you can improve results. A simple pre-shave routine matters more than any brand. Wash your face with warm water and whatever gentle cleanser is available, then leave a thin film of water on the skin. Apply a small amount of hair conditioner, wait thirty seconds, and layer a slicker lather over it. Shave in a mirror you can actually see, which sometimes means cracking the bathroom door to use the full-length mirror outside after you lather.
If you’re camping or on a long layover, shave at a time of day when you can rinse thoroughly. Trying to shave in a cramped airplane lavatory after a red-eye is a good way to bleed for the next three hours. A young blade plus bad conditions cancels out. Shift your shave by twelve hours if you can.
Clogged blade triage
When a disposable starts skipping mid-shave, it’s usually clogged. Take a moment to rescue it. Rinse in strong, directed water. If water pressure fails you, use a water bottle squeeze to force out debris from the back of the head. Tap the side of the head against a towel, not the blade edge against porcelain. If a stubborn strip of hair stays lodged between blades, a toothpick or even the corner of a business card slipped between them can clear it. Don’t pry with metal. You’ll distort the gap and turn the rest of the shave into a scratchy mess.
A quiet nod to the gearheads
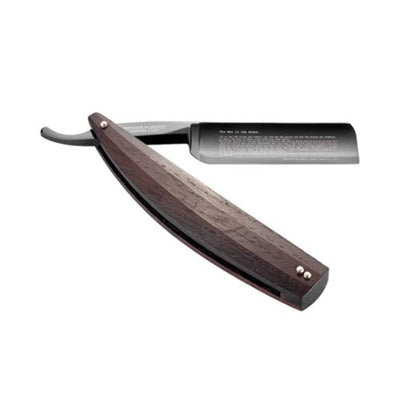
At home, there’s joy in ritual. A well-balanced Merkur 34C loaded with fresh double edge razor blades or a high-precision Henson shaving setup rewards slow weekend shaves. A Shavette teaches blade awareness fast. A traditional shaving brush and a decent puck of shaving soap raise the baseline quality of any shave, even with a disposable as your blade. If you’re in Canada and used to ordering from Henson shaving Canada or similar shops, you already know travel versions exist for nearly everything except the blade itself in a disposable razor. Borrow the best habits from your home setup: prep, angle, minimal pressure, and thorough rinsing. Technique travels even when your favorite safety razor stays home.
Aftercare that fits a carry-on
Good post-shave care can rescue a mediocre pass. Rinse with cool water until the slickness disappears. Pat dry, don’t rub. If your skin tolerates it, a few drops of a light moisturizer or balm seals the surface and calms redness. Unscented options travel better and won’t clash with cologne. If you nick yourself, an alum block the size of a sugar cube belongs in your kit. Wet it, press for five seconds, and the sting tells you it’s working. Styptic pencils are smaller and stop bleeding faster but can leave a chalky mark. If you’re heading into a meeting, wipe the residue with a damp corner of a towel after a minute.
Fragrance-heavy aftershaves feel refreshing, but alcohol on abraded skin prolongs irritation. If you like the scent, use it sparingly over a balm, not directly on raw skin. The balm handles recovery, the splash handles presentation.
When to upgrade the disposable
Not all disposables are equal. Single blade options with a fixed head and a sturdy handle usually out-shave ultra-cheap multi-blade packs. They rinse cleaner and demand less pressure. If you’re buying at a gas station, choose the one that looks simple and solid rather than the one promising five vibrating blades. Weight matters too. A slightly heavier handle helps you avoid pressing. If you can’t find that, grip lower on the handle to reduce leverage.
Buy in small quantities and test. If a brand gives you three comfortable shaves consistently, that’s your travel standard. Don’t cling to a pack that punishes your face just because it was on sale. Razor blades in disposables are not regulated like fine tools, and batch variation is real. The difference between an easy week and an itchy one often comes down to the ten seconds it takes to pick the right package at the pharmacy.
A compact routine you can remember
- Hydrate for at least a minute, build a thin, slick lather, and keep it wet. Find the cutting angle by sound, not pressure, and use micro-strokes. Rinse the head frequently, clear clogs decisively, and dry-strop after. Limit to two passes, with the second across the grain, plus targeted touch-ups. Finish with cool water and a light balm; use alum only where needed.
Troubleshooting quick reference
- Tugging from the first stroke means the blade is done or your prep is dry. Rehydrate and relather. If tugging persists, replace. Persistent razor burn signals pressure problems. Back off and reset the angle. Consider a thinner lather and shorter strokes. Missed patches often hide under lather. Rinse completely between passes so you can see what you’re doing. Nick-prone spots like the Adam’s apple or jaw corners need skin displacement. Move the skin sideways to shave flat sections. Red bumps a day later can mean against-the-grain on the neck was too aggressive. Next time, stop at across-the-grain there.
Why these habits transfer from better tools
If you’ve ever shaved with safety razors, you’ve built good reflexes: angle discipline, minimal pressure, and respect for grain direction. Those skills carry over perfectly to disposables, even if the tool feels flimsy by comparison. A straight razor rewards patient prep. A Shavette punishes lazy angles. A Henson razor’s fixed geometry teaches you to trust the head design and avoid overthinking. All of those lessons make a disposable razor shave better on the road.
What sets seasoned shavers apart isn’t a drawer full of gear. It’s the sequence they follow without fail. Wet the hair until it surrenders. Apply a slick film, not a fluffy meringue. Glide the blade at the right angle and lift often to rinse. Respect tricky terrain. Finish with cool water and something soothing. Whether you’re holding a polished brass safety razor with fresh double edge razor blades or a plastic two-blade throwaway from the hotel front desk, the fundamentals don’t change.
A final word from countless hotel sinks
Travel exposes every weakness in your routine. The mirror is bad, the lighting worse, and the water unpredictable. Yet with a little discipline and a few workarounds, a disposable can give you the kind of shave that doesn’t draw attention, which is the point. When you unpack at home, you can reach for your preferred kit again, a Merkur 34C on a Sunday morning with a favorite shaving soap and a well-broken-in shaving brush, or a dialed-in Henson razor. On the road, keep it simple. Prep well, mind the angle, rinse often, and retire the blade before it bites back. A better shave on the go isn’t luck. It’s a handful of small decisions that add up to comfort.